transcriber
Audio Transcriber
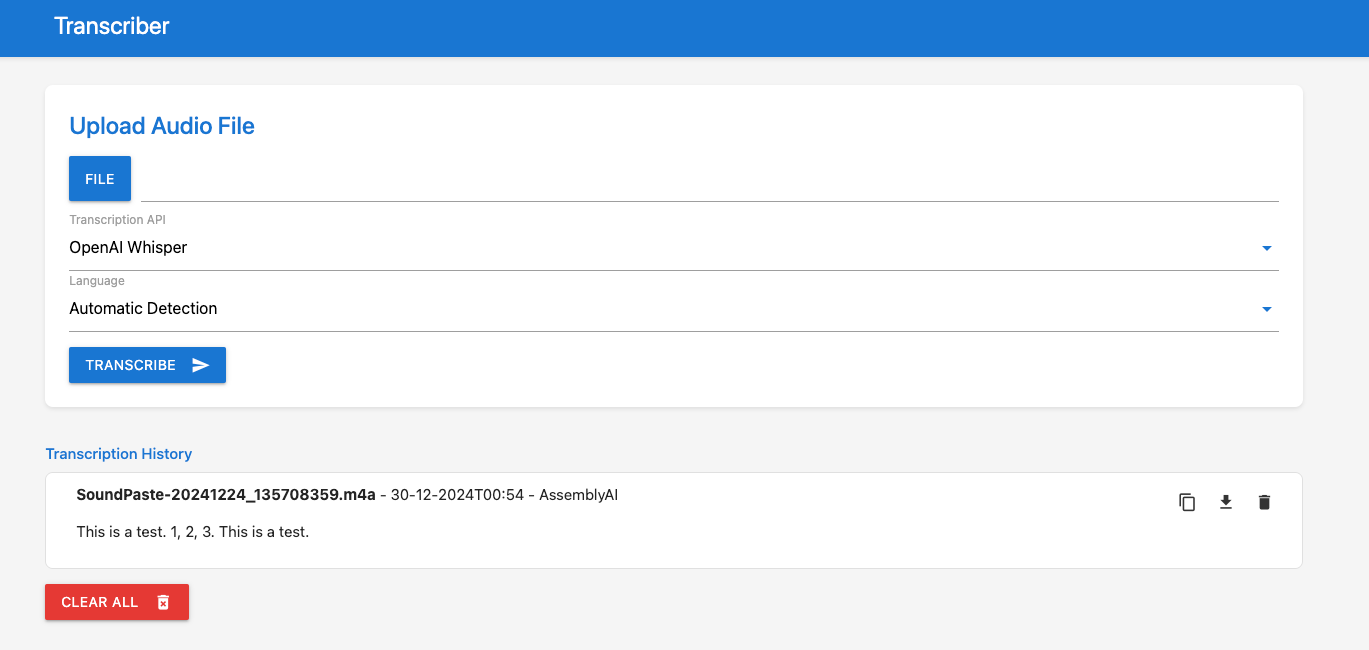
This project is an audio transcription application with a user-friendly web interface. It allows you to upload audio files and get transcriptions using either AssemblyAI or OpenAI’s Whisper API.
Features
- Web Interface: A clean and intuitive interface built with HTML, CSS and JavaScript.
- Multiple Transcription APIs: Supports both AssemblyAI and OpenAI Whisper for transcription.
- Language Selection: You can choose the language of the audio or use automatic language detection.
- Transcription History: Stores and displays a history of your transcriptions.
- Large File Handling: Handles audio files larger than 25MB (OpenAI Whisper’s API limit) by splitting them into chunks for transcription.
- Docker Deployment: Easy deployment using Docker Compose.
Usage
- Upload Audio File: Click the “File” button to select an audio file from your computer.
- Select API: Choose either AssemblyAI or OpenAI Whisper from the dropdown.
- Select Language: Choose the language of your audio or leave it as “Automatic Detection.”
- Transcribe: Click the “Transcribe” button.
- View History: Your transcriptions will appear in the “Transcription History” section. You can copy, download, or delete them.
Prerequisites
- API Keys: You’ll need API keys for AssemblyAI and/or OpenAI Whisper. Sign up for accounts on their respective websites to obtain them.
- Docker: Make sure Docker is installed and running on your machine.
Environment Variables
The application uses the following environment variables:
| Variable | Description | Accepted Values | Default |
|---|---|---|---|
TZ |
The timezone for the application. | Any valid timezone string (e.g., Europe/Amsterdam, America/New_York) |
UTC |
ASSEMBLYAI_API_KEY |
Your API key for AssemblyAI. | Your AssemblyAI API key | None (required) |
OPENAI_API_KEY |
Your API key for OpenAI Whisper. | Your OpenAI API key | None (required) |
DEFAULT_TRANSCRIBE_API |
The default transcription API to use when the application loads. | assemblyai or openai |
assemblyai |
DEFAULT_LANGUAGE |
The default language to use for transcription when the application loads. | auto, en, nl, fr, es |
auto |
Installation and Deployment
You have two primary options for installation and deployment:
Option 1: Using Docker Hub (Recommended)
This is the easiest way to get started. You can pull the pre-built image from Docker Hub and run it directly.
-
Pull the Docker Image:
docker pull arnoulddw/transcriber-app:latest -
Run the Docker Container:
docker run -d -p 5001:5001 \ -e TZ="Your/Timezone" \ -e ASSEMBLYAI_API_KEY="your_assemblyai_api_key" \ -e OPENAI_API_KEY="your_openai_api_key" \ -e DEFAULT_TRANSCRIBE_API="assemblyai" \ -e DEFAULT_LANGUAGE="auto" \ --name transcriber-app \ arnoulddw/transcriber-app:latest- Replace
"Your/Timezone"with your desired timezone (e.g.,Europe/London). - Replace
"your_assemblyai_api_key"and"your_openai_api_key"with your actual API keys. - You can change the
DEFAULT_TRANSCRIBE_APIandDEFAULT_LANGUAGEif needed. - The
-dflag runs the container in detached mode (in the background). - The
-p 5001:5001flag maps port 5001 on your host machine to port 5001 in the container. --name transcriber-appgives your container a name for easier management.
- Replace
Option 2: Using Docker Compose (For Development or Customization)
If you want to customize the application or develop it further, you can use Docker Compose to build and run the image locally.
Step 1: Clone the Repository
- Open a terminal.
- Navigate to the directory where you want to store the project.
-
Clone this repository:
 git clone https://github.com/arnoulddw/transcriber
 cd [Your-Project-Name]
Step 2: Configure Environment Variables in docker-compose.yml
- Open the
docker-compose.ymlfile. -
Add your API keys and other environment variables under the
environmentsection. Make sure to replace the placeholder values with your actual API keys:services: transcriber: build: context: . dockerfile: Dockerfile ports: - "5001:5001" volumes: - ./backend:/app/backend - ./temp_uploads:/app/temp_uploads environment: - TZ=${TZ:-UTC} - ASSEMBLYAI_API_KEY=your_assemblyai_api_key - OPENAI_API_KEY=your_openai_api_key - DEFAULT_TRANSCRIBE_API=${DEFAULT_TRANSCRIBE_API:-assemblyai} - DEFAULT_LANGUAGE=${DEFAULT_LANGUAGE:-auto} restart: unless-stopped
Step 3: Build and Run with Docker Compose
-
In the project’s root directory, run the following command:
docker-compose up -d --buildThis will build the Docker image and start the container in detached mode.
Step 4: Access the Application
-
Open your web browser and go to:
http://localhost:5001
Development (Local Setup)
If you want to develop or test the application locally before deploying it with Docker, follow these steps:
Step 1: Set up a Virtual Environment
- Open your terminal and navigate to the project directory.
-
Create a virtual environment:
python3 -m venv venv -
Activate the virtual environment:
 # On Linux/macOS
 source venv/bin/activate

 # On Windows
 venv\Scripts\activate
Step 2: Install Dependencies
-
Install the required Python packages:
pip install -r backend/requirements.txt
Step 3: Configure Environment Variables (Local)
-
You can either set the environment variables temporarily in your terminal:
# Example for Linux/macOS: export ASSEMBLYAI_API_KEY=your_assemblyai_api_key export OPENAI_API_KEY=your_openai_api_key export TZ=Europe/London # ... other variables -
Or, you can create a
.envfile locally (but don’t commit it to Git) and add the variables there. Then, usepython-dotenvto load them in yourapp.py(you’ll need to install it:pip install python-dotenv).
Step 4: Run the Application
-
Start the Flask development server:
python backend/app.py -
Access the application in your browser at
http://127.0.0.1:5001/.
Troubleshooting
- Port 5001 is in use: If port 5001 is already in use, you can change the port mapping in the
docker-compose.ymlfile. - API Key Errors: Double-check that your API keys are correct and that your accounts with AssemblyAI and OpenAI are active.
- File Upload Issues: Ensure that the file you’re uploading is a supported audio format (mp3, mpga, m4a, wav and webm).
- Docker Errors: If you encounter Docker errors, make sure Docker is running correctly and that you have sufficient permissions.
Contributing
If you’d like to contribute to this project, please feel free to submit pull requests or open issues on the GitHub repository.
License
This project is licensed under the MIT License.